MCP clients
Each MCP client is a separate integration with an AI assistant (Claude, ChatGPT, Cursor, Hermes…). Here you authorize, inspect, and revoke each one.
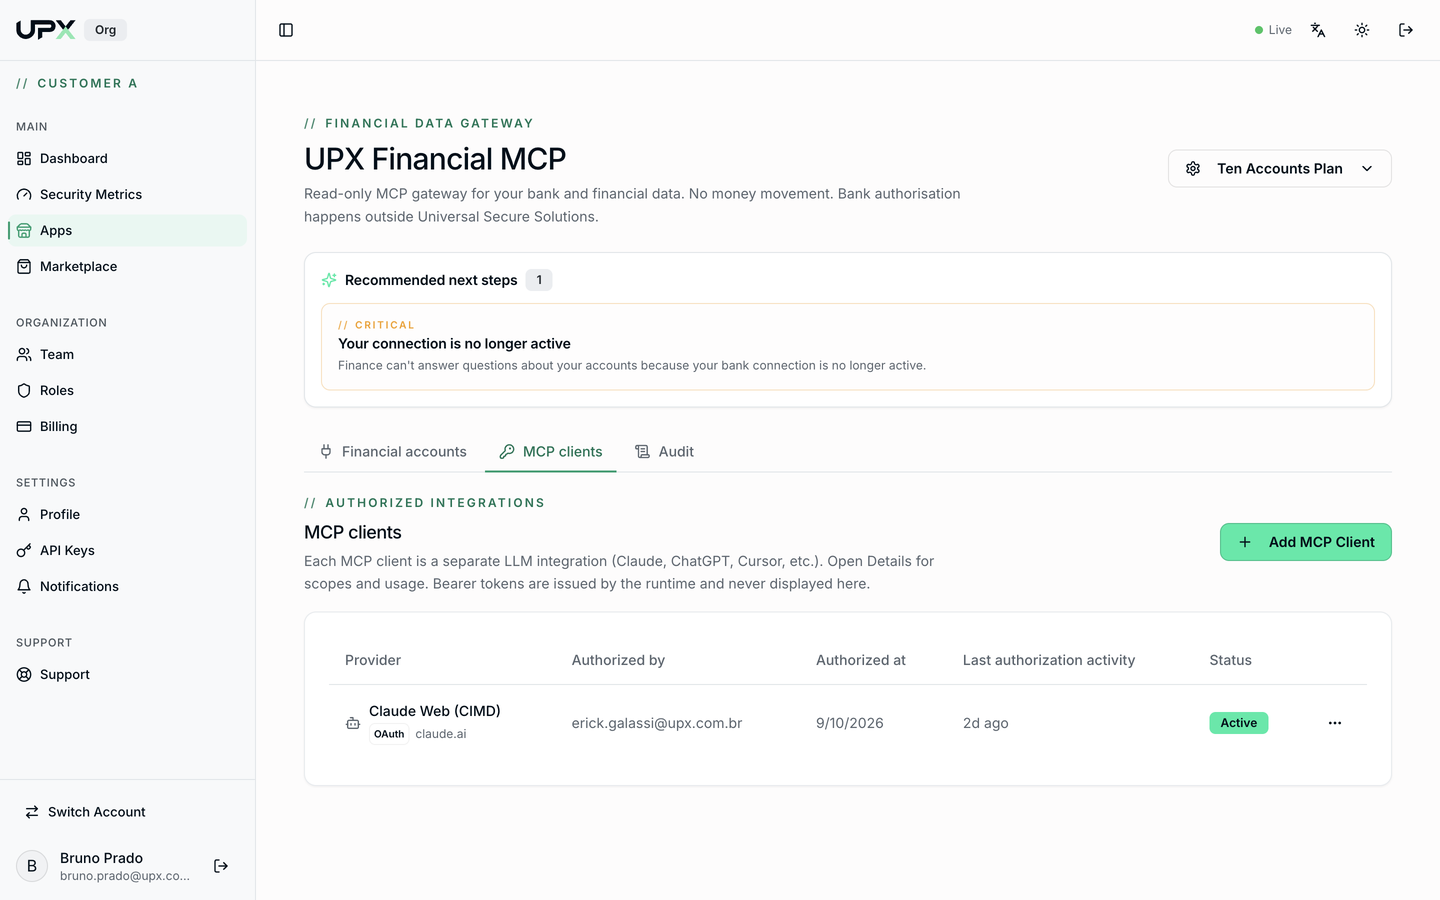
Bearer tokens are issued by the runtime and are never displayed in the portal. You don't need to copy or store any secret — authorization happens via OAuth or an approval link.
Add a client
Click Add MCP Client. The dialog shows the MCP server endpoint and three client options, each with a step-by-step wizard:
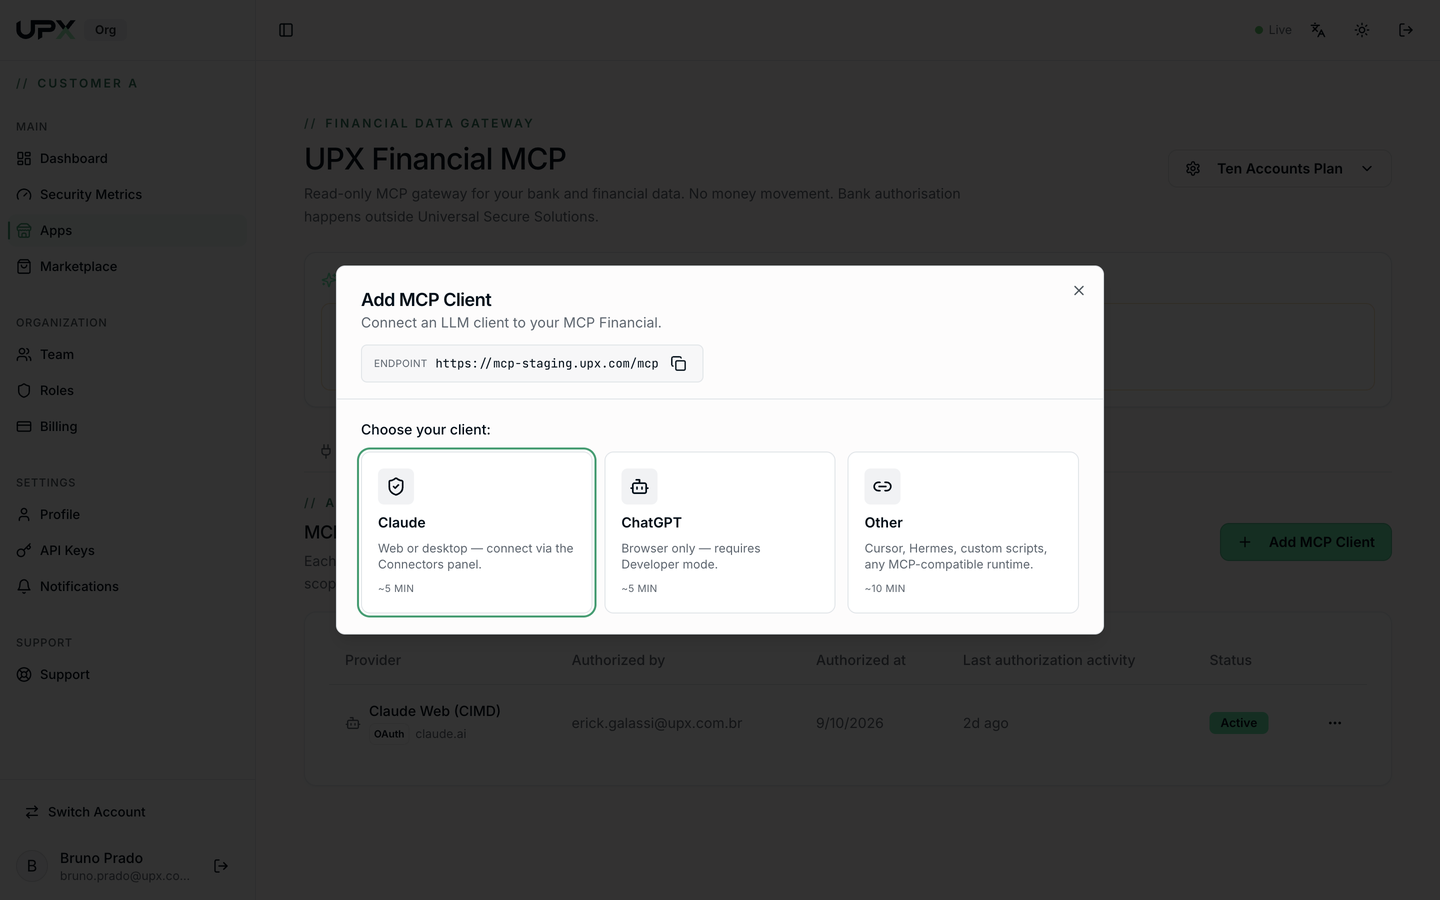
| Client | How it connects | Time |
|---|---|---|
| Claude | Web or desktop, via the Connectors panel | ~5 min |
| ChatGPT | Browser only, requires Developer mode | ~5 min |
| Other | Cursor, Hermes, scripts, any MCP runtime | ~10 min |
Claude (7 steps)
- Open the Connectors page — at
claude.ai/customize/connectors. The same flow works on Claude web and the desktop app.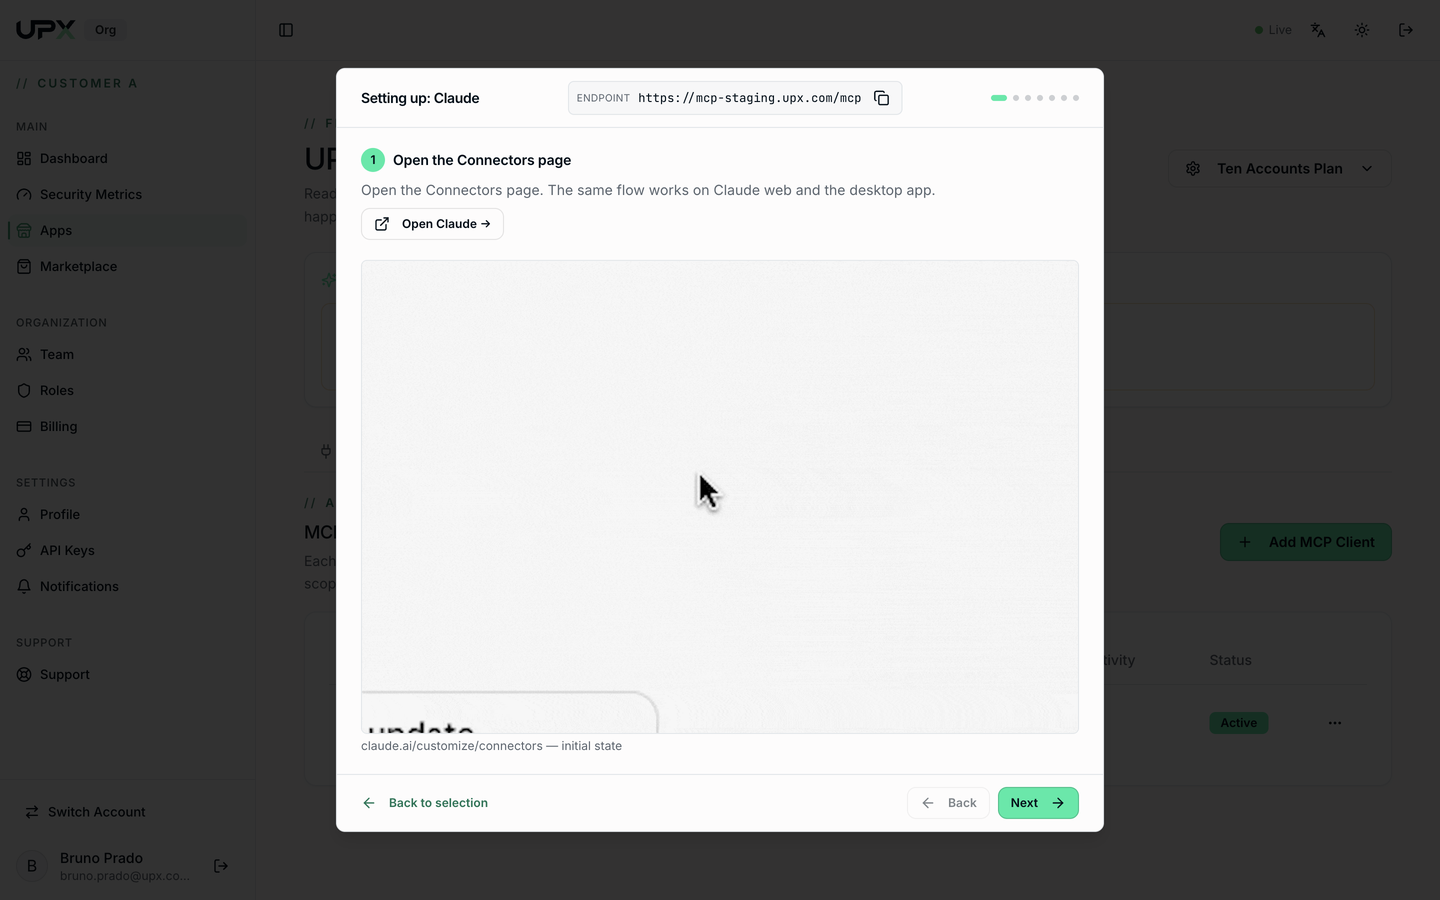
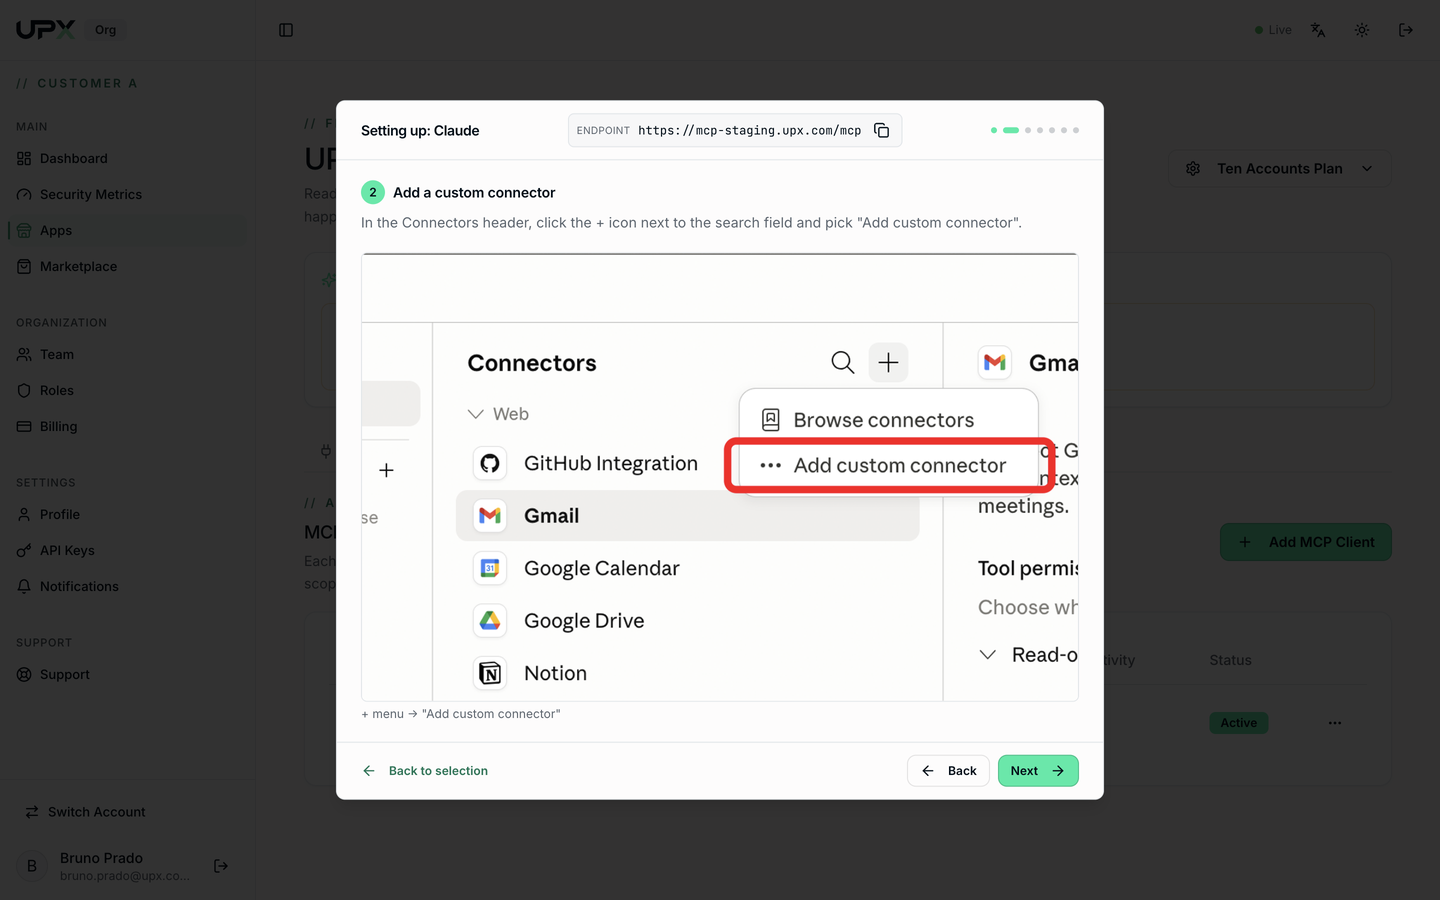
- Add a custom connector — in the Connectors header, click the + icon next to the search field and pick Add custom connector.
- Fill in the connector details — Name
UPX Financial, Remote MCP server URL = the endpoint shown in the wizard. Leave Advanced settings untouched; Claude discovers the rest automatically.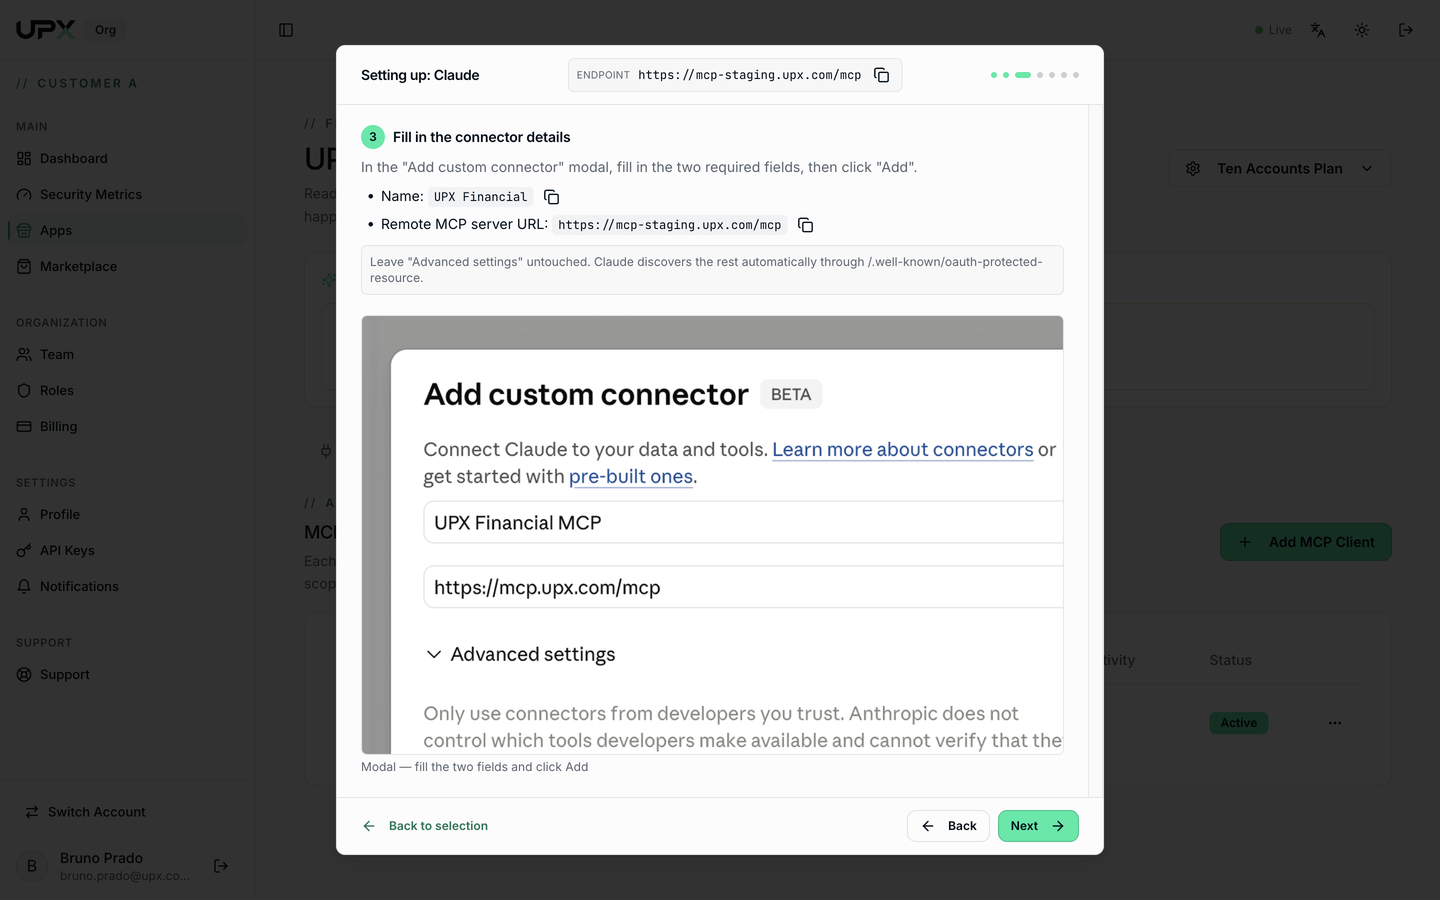
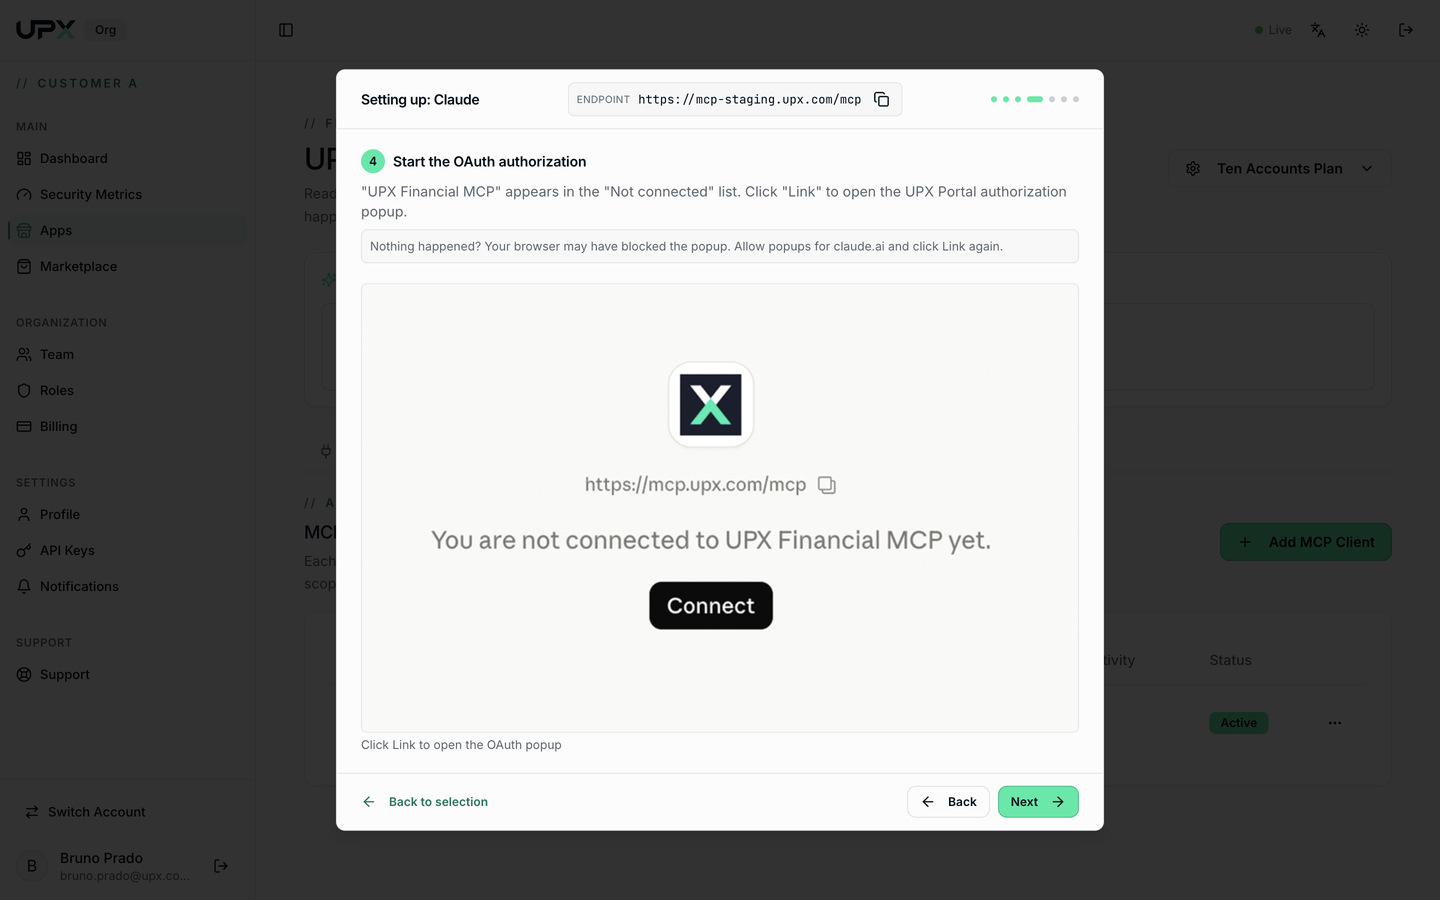
- Start the OAuth authorization — the connector appears in the "Not connected" list. Click Link to open the UPX Portal popup.
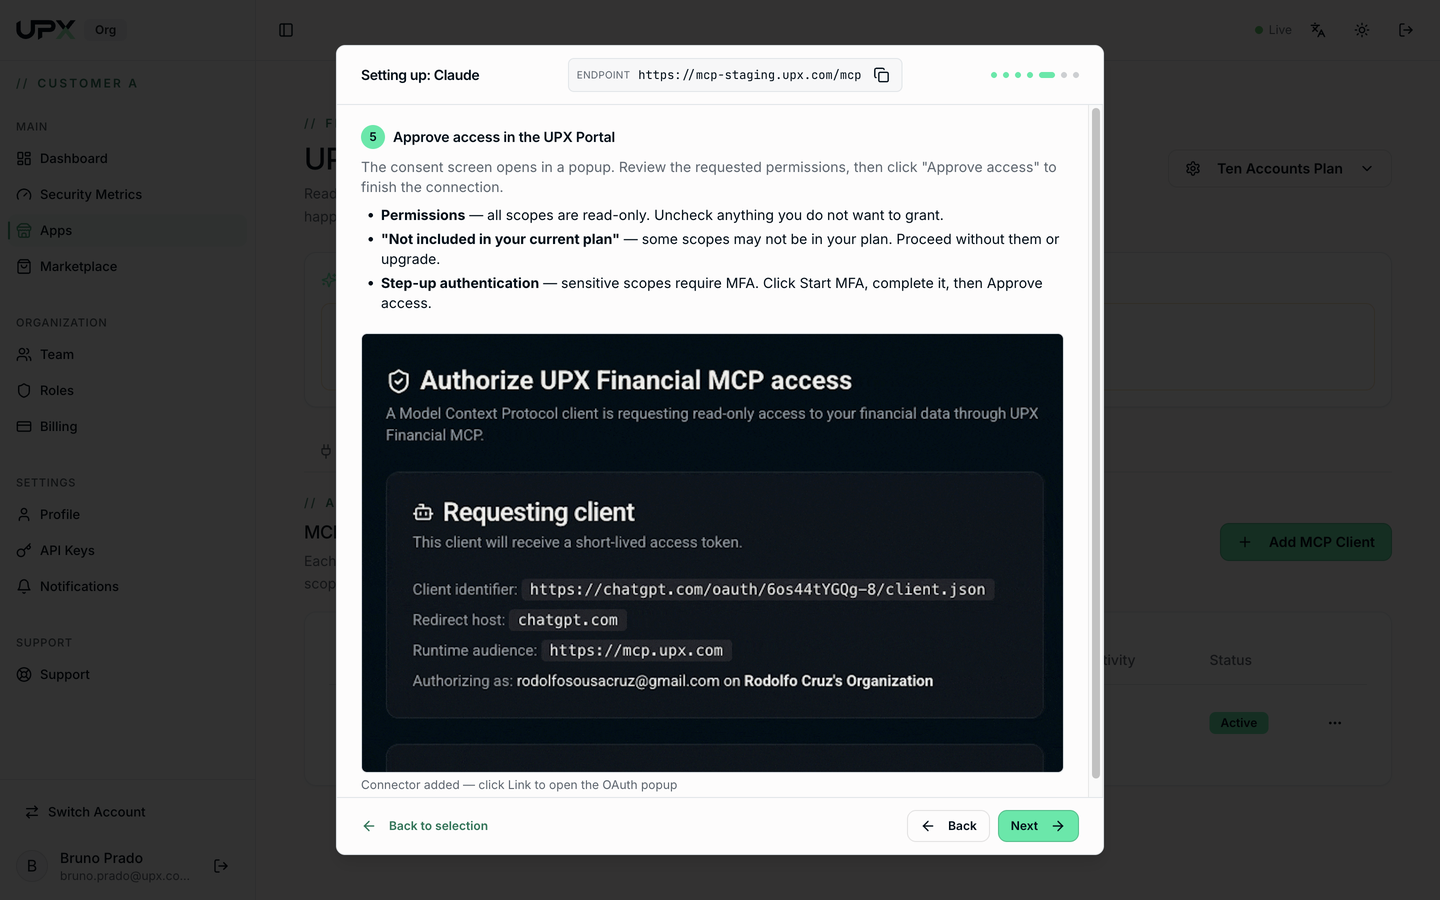
- Approve access in the UPX Portal — review the permissions (all read-only), uncheck anything you don't want to grant, then click Approve access. Sensitive scopes require MFA.
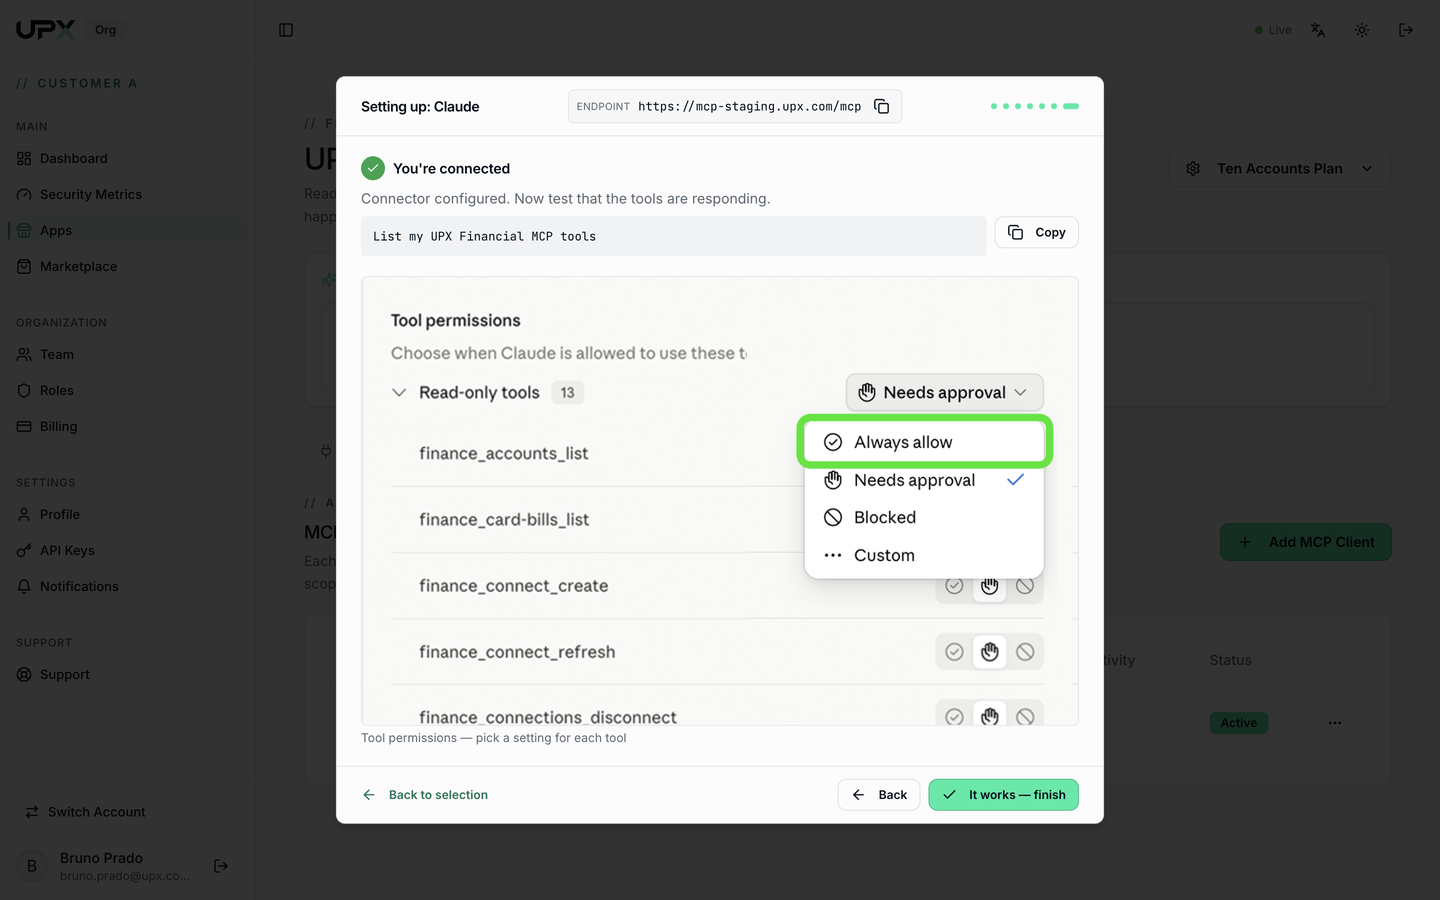
- Adjust tool permissions — in Claude, pick a setting per tool: Always allow, Needs approval (default), Blocked, or Custom. Suggestion: set
finance_*_listto Always allow, keep everything else on Needs approval.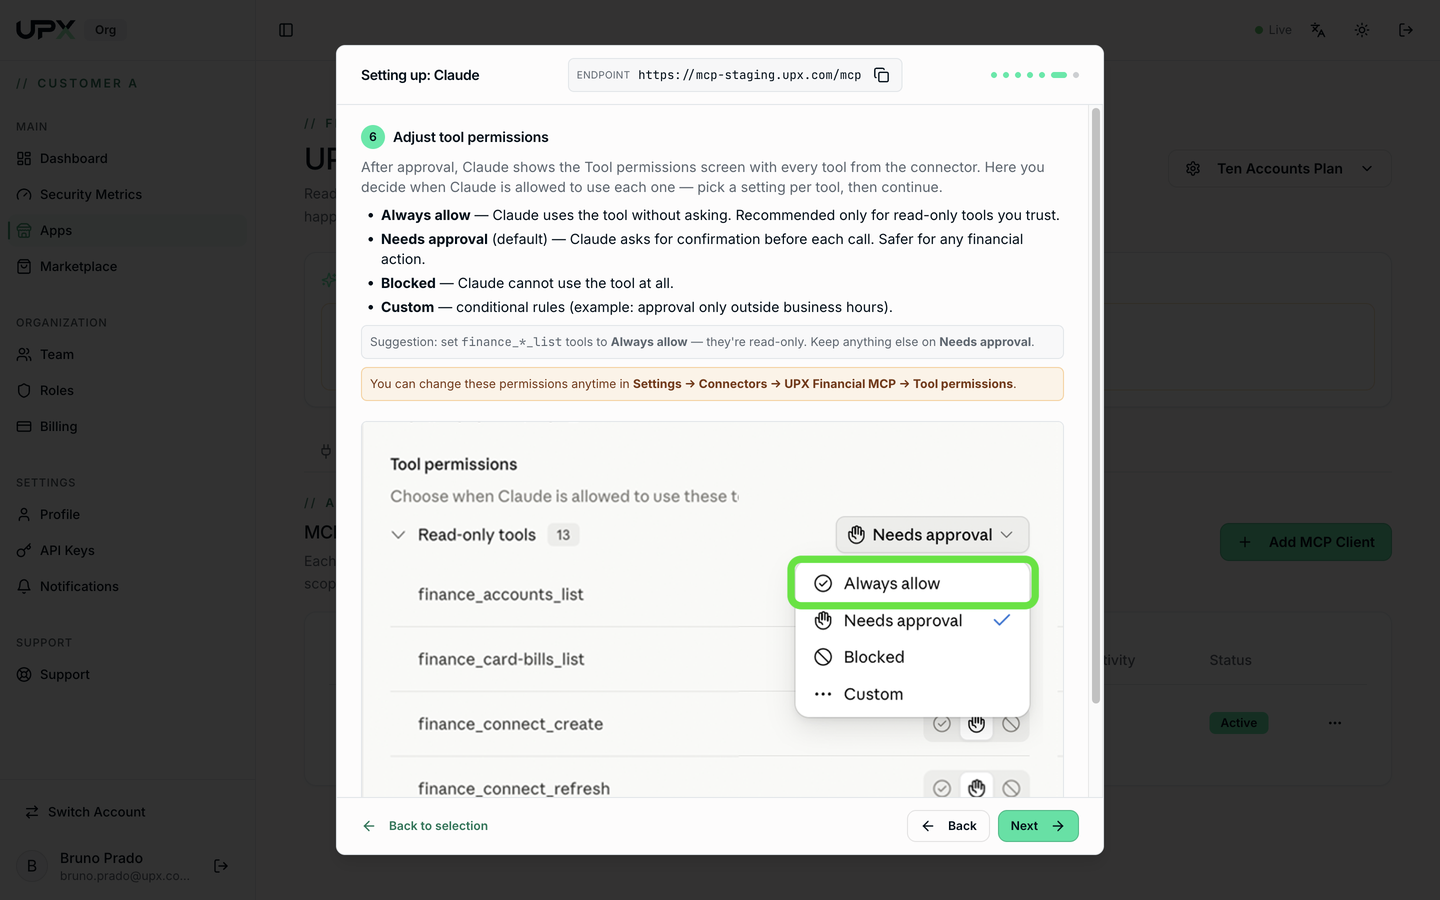
- Test — copy the suggested prompt ("List my UPX Financial MCP tools") and click It works — finish.
ChatGPT (5 steps)
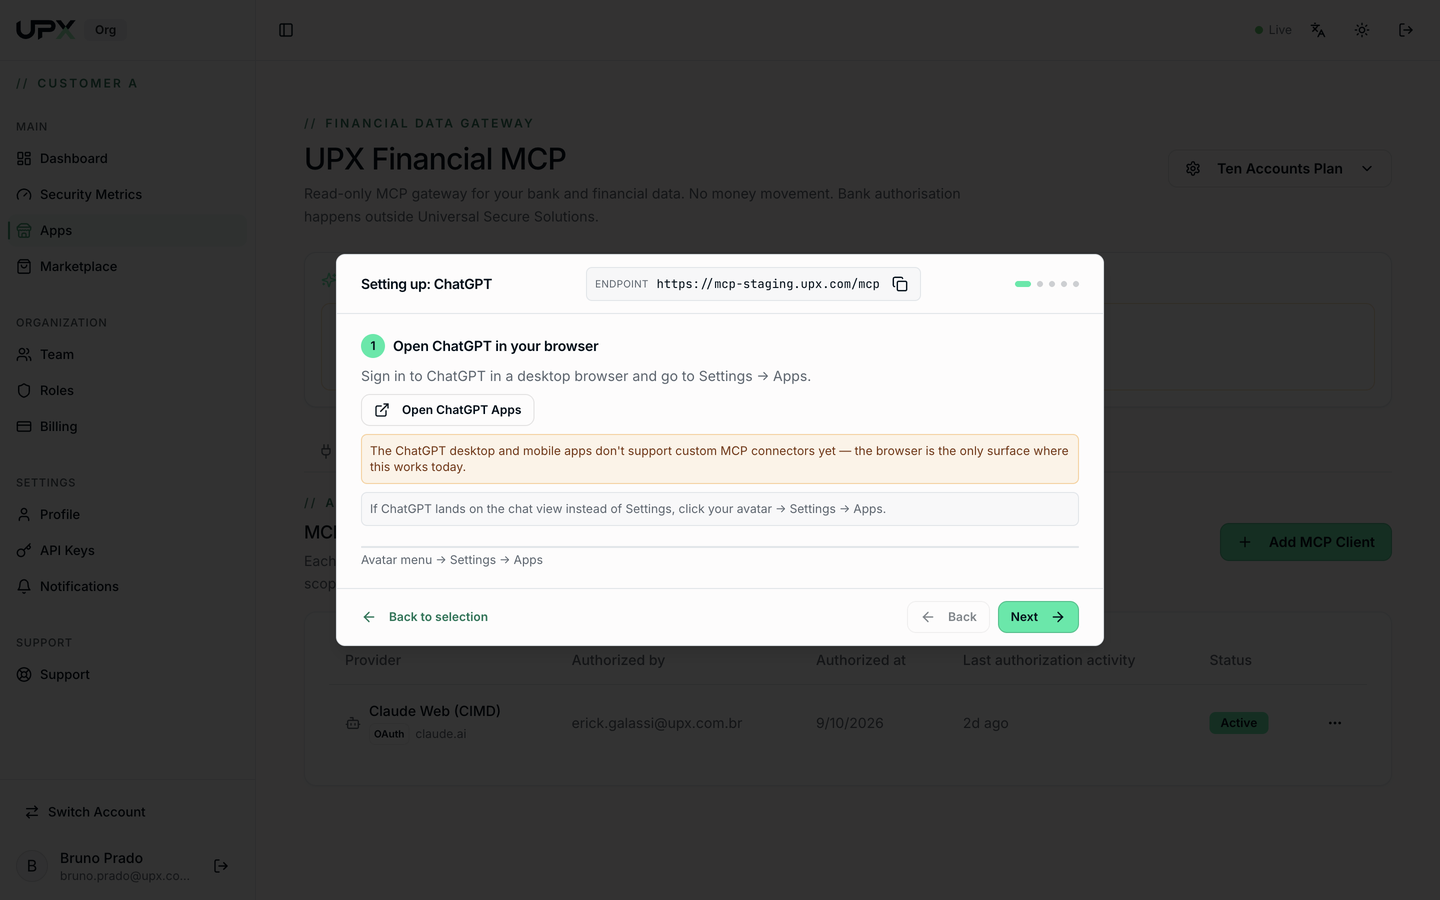
- Open ChatGPT in your browser and go to Settings → Apps. The desktop and mobile apps don't support custom MCP connectors yet.
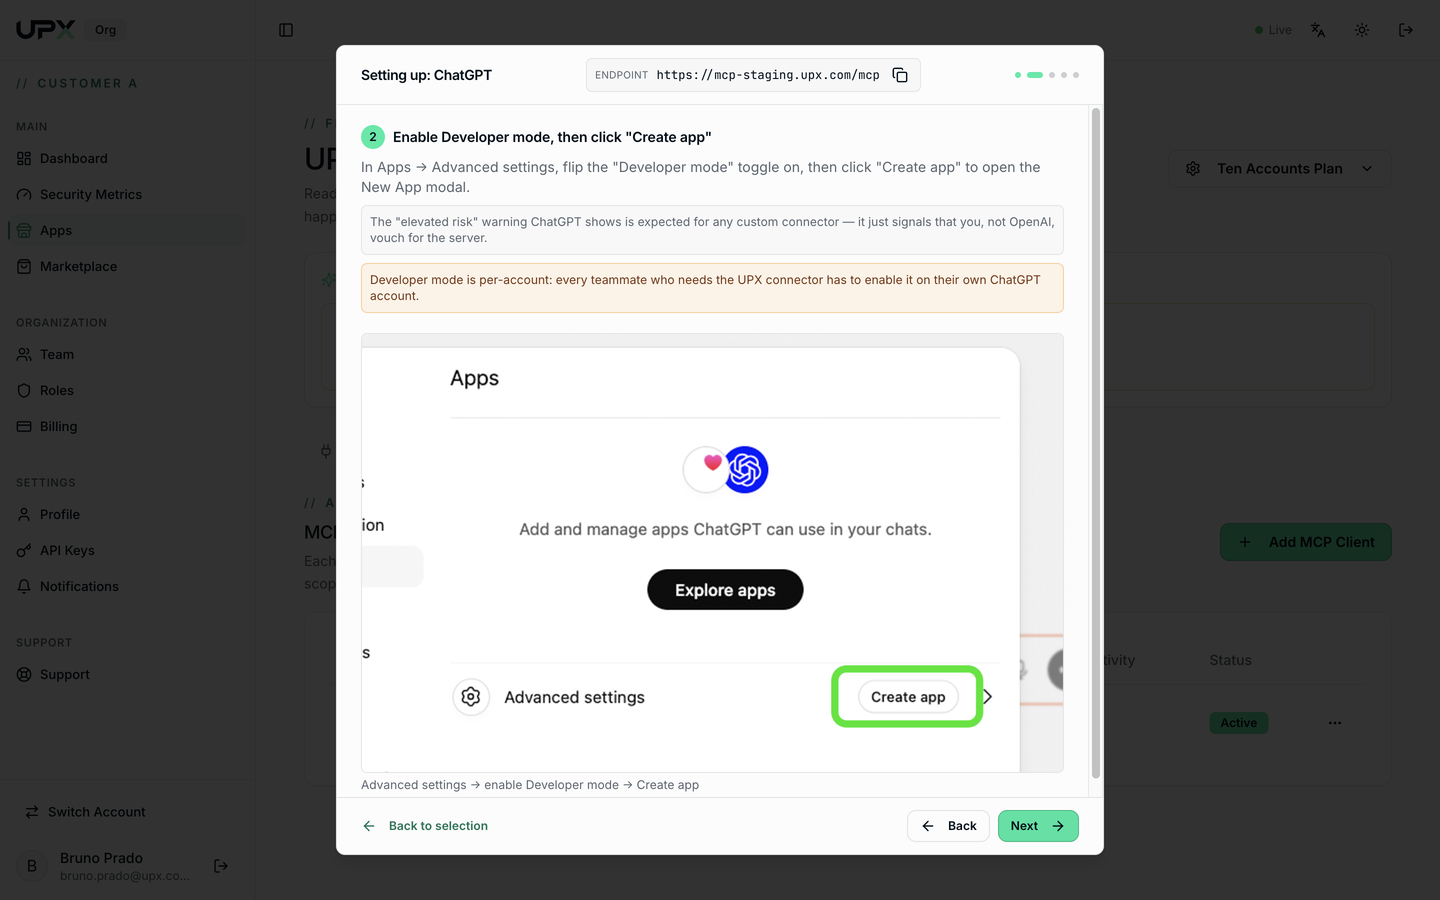
- Enable Developer mode under Advanced settings and click Create app. The "elevated risk" warning is expected for any custom connector. Developer mode is per-account: every teammate enables it on their own.
- Fill in the New App form — Name
UPX Financial, MCP Server URL = endpoint, Authentication OAuth. Check "I understand and want to continue" and click Create.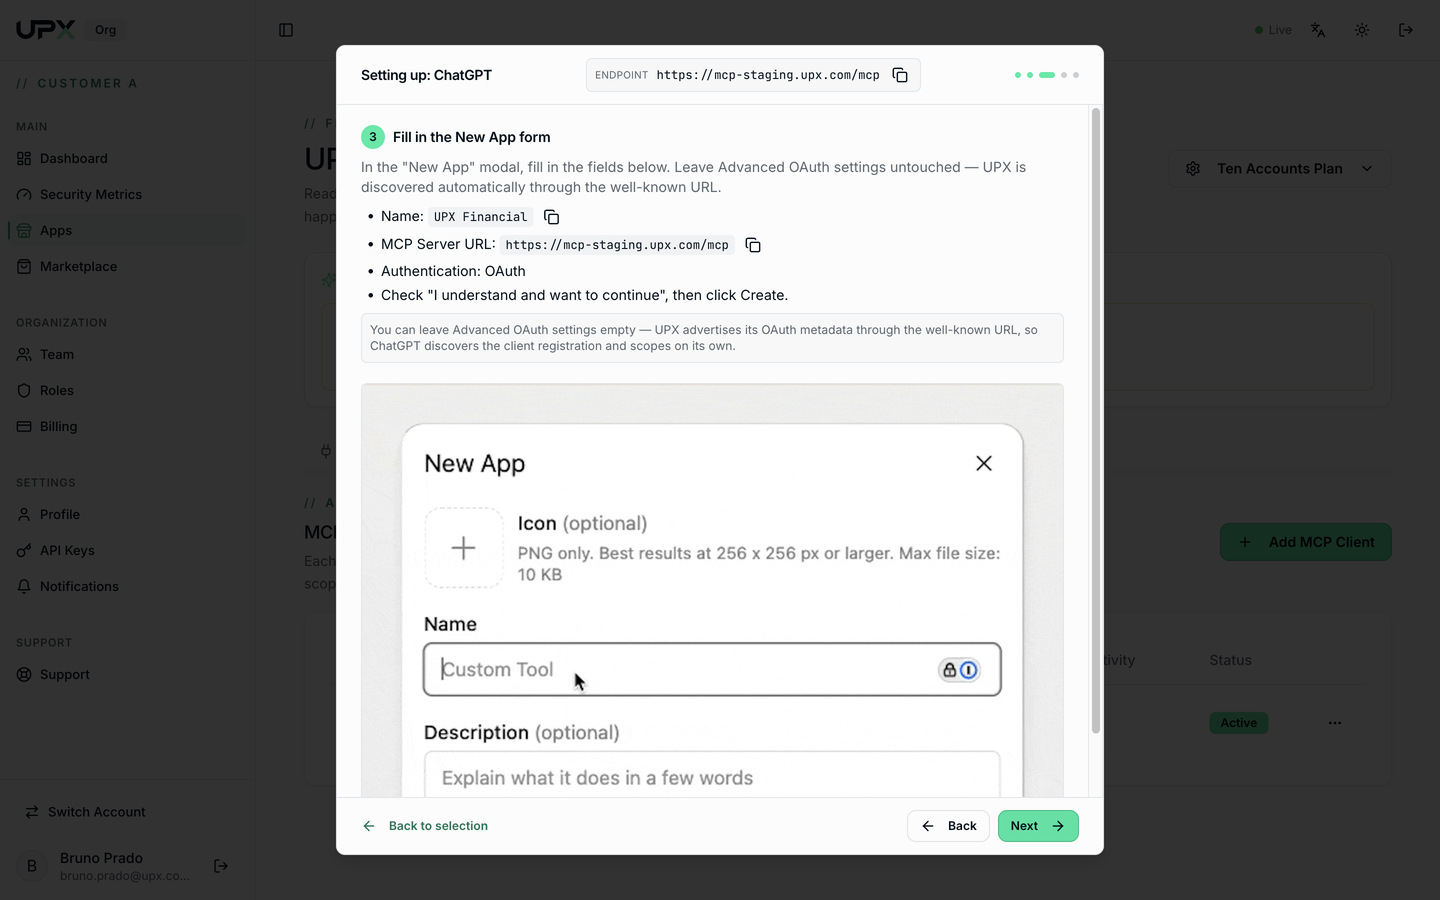
- Authorize access in the UPX Portal — the popup opens; review the scopes and click Approve access. If nothing opens, allow popups for
chatgpt.comand click Create again.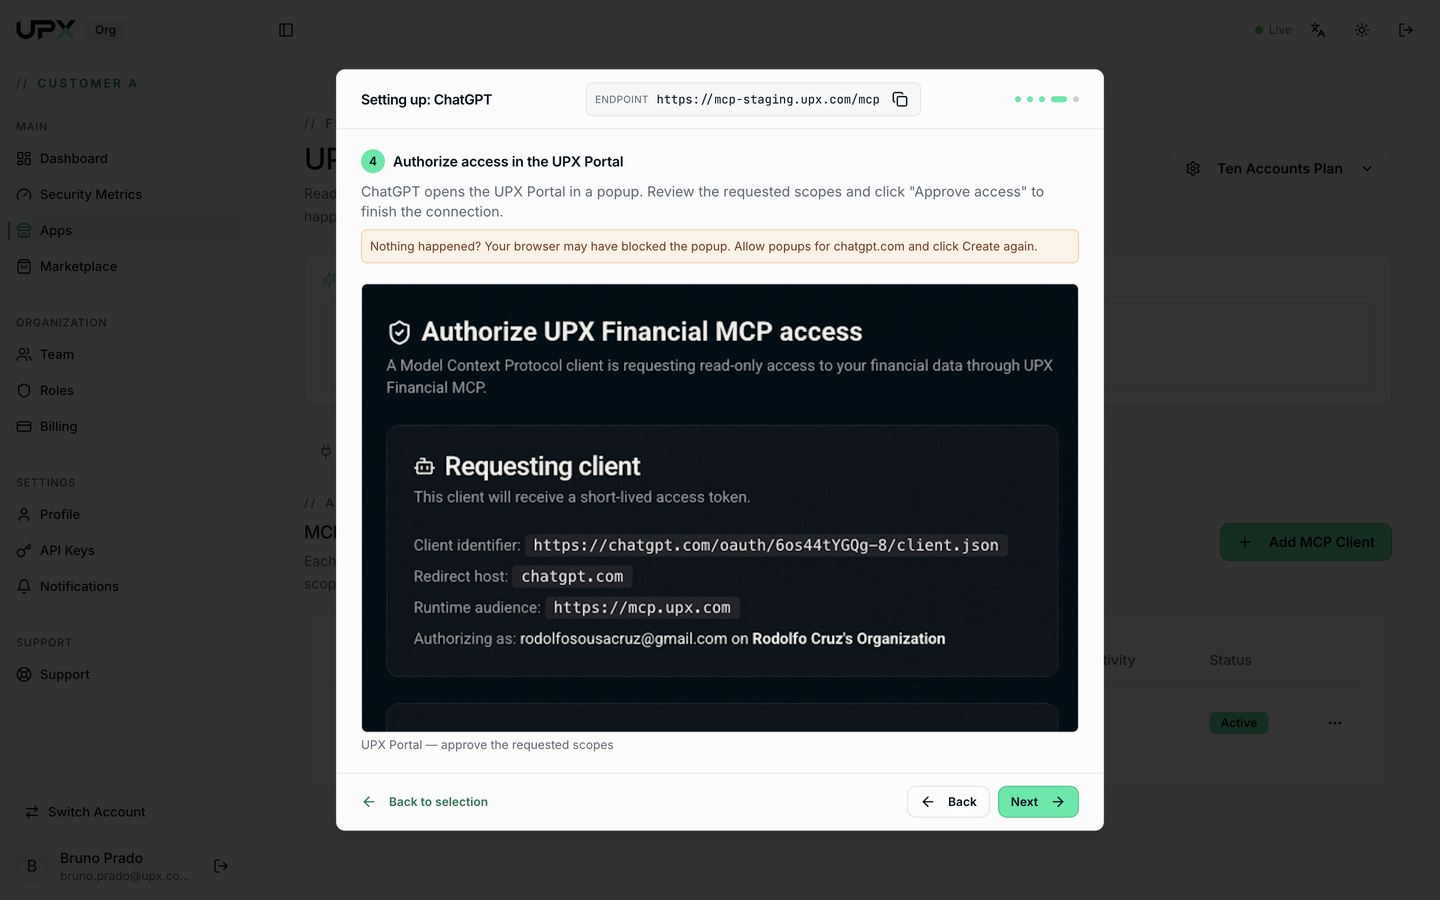
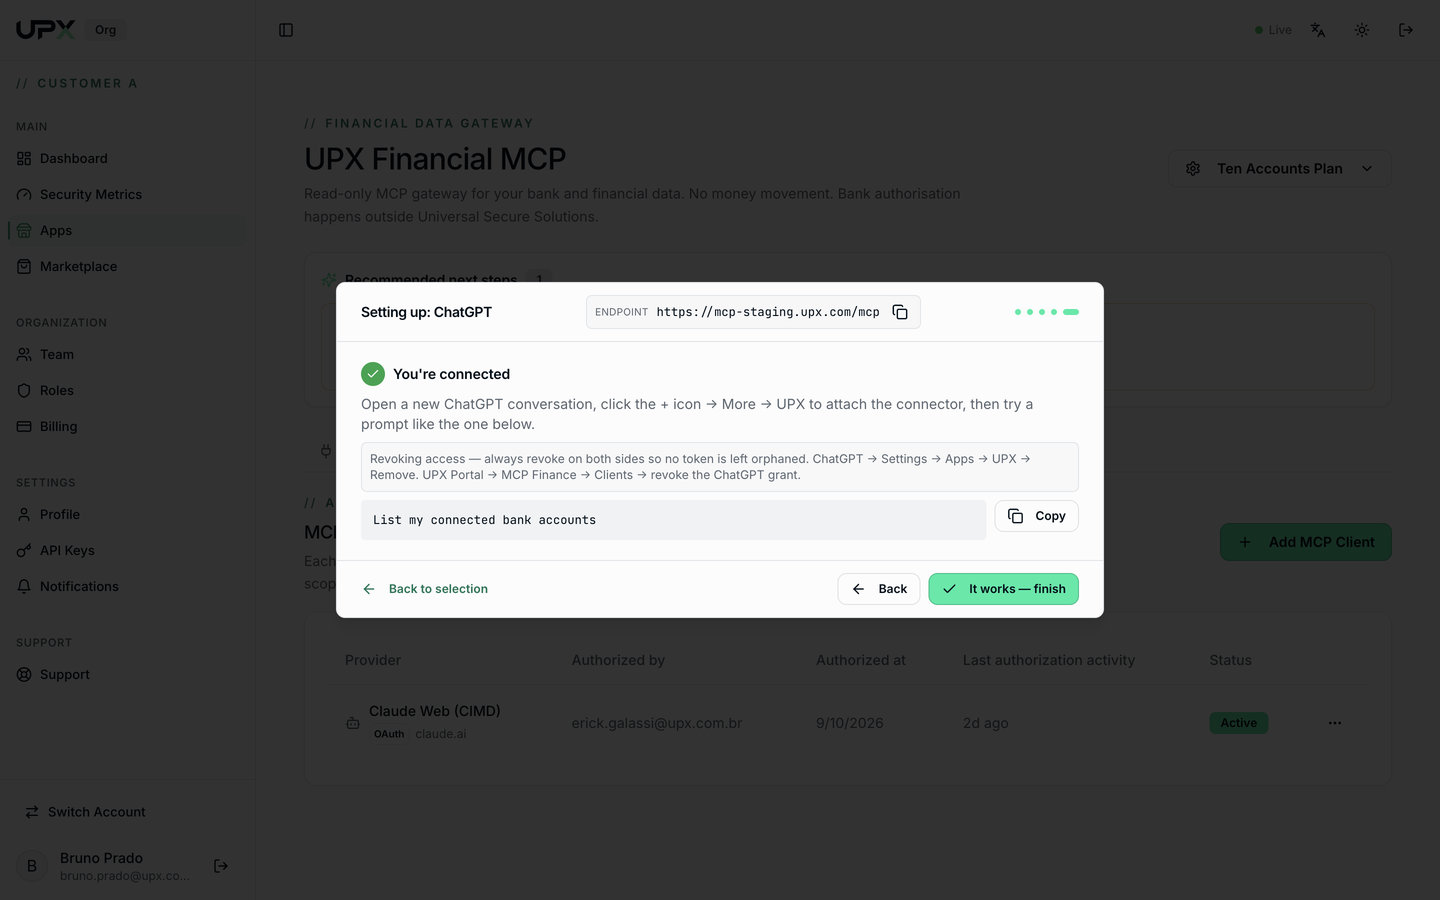
- You're connected — in a new conversation, + → More → UPX attaches the connector. Test with "List my connected bank accounts".
Other — AI agents & custom clients (4 steps)
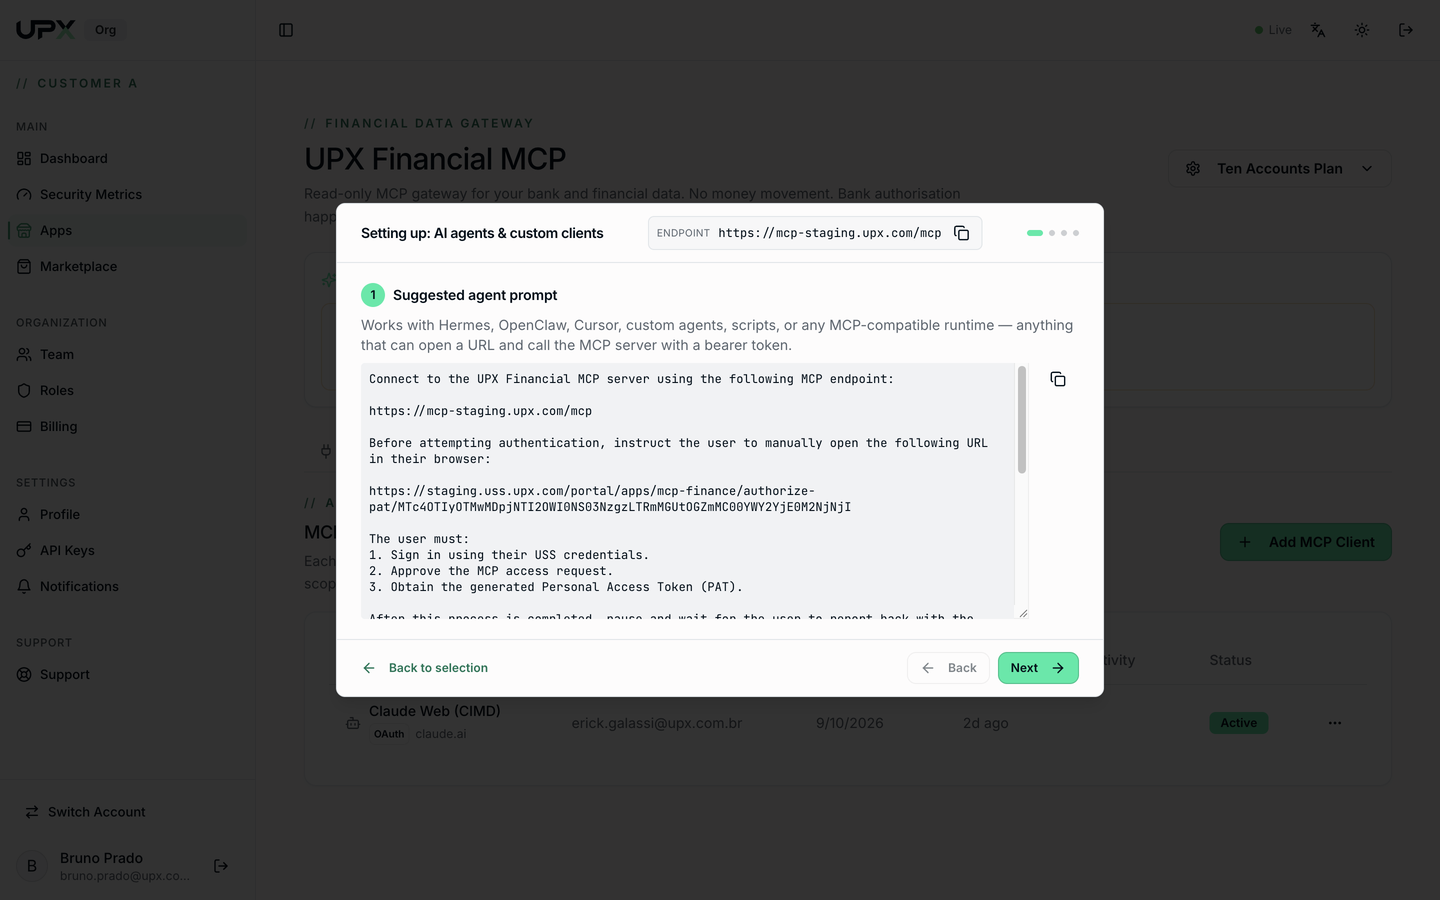
For Hermes, OpenClaw, Cursor, scripts, or any runtime that can open a URL and call the MCP server with a bearer token.
- Suggested agent prompt — copy and paste it into your agent; it knows what to do.
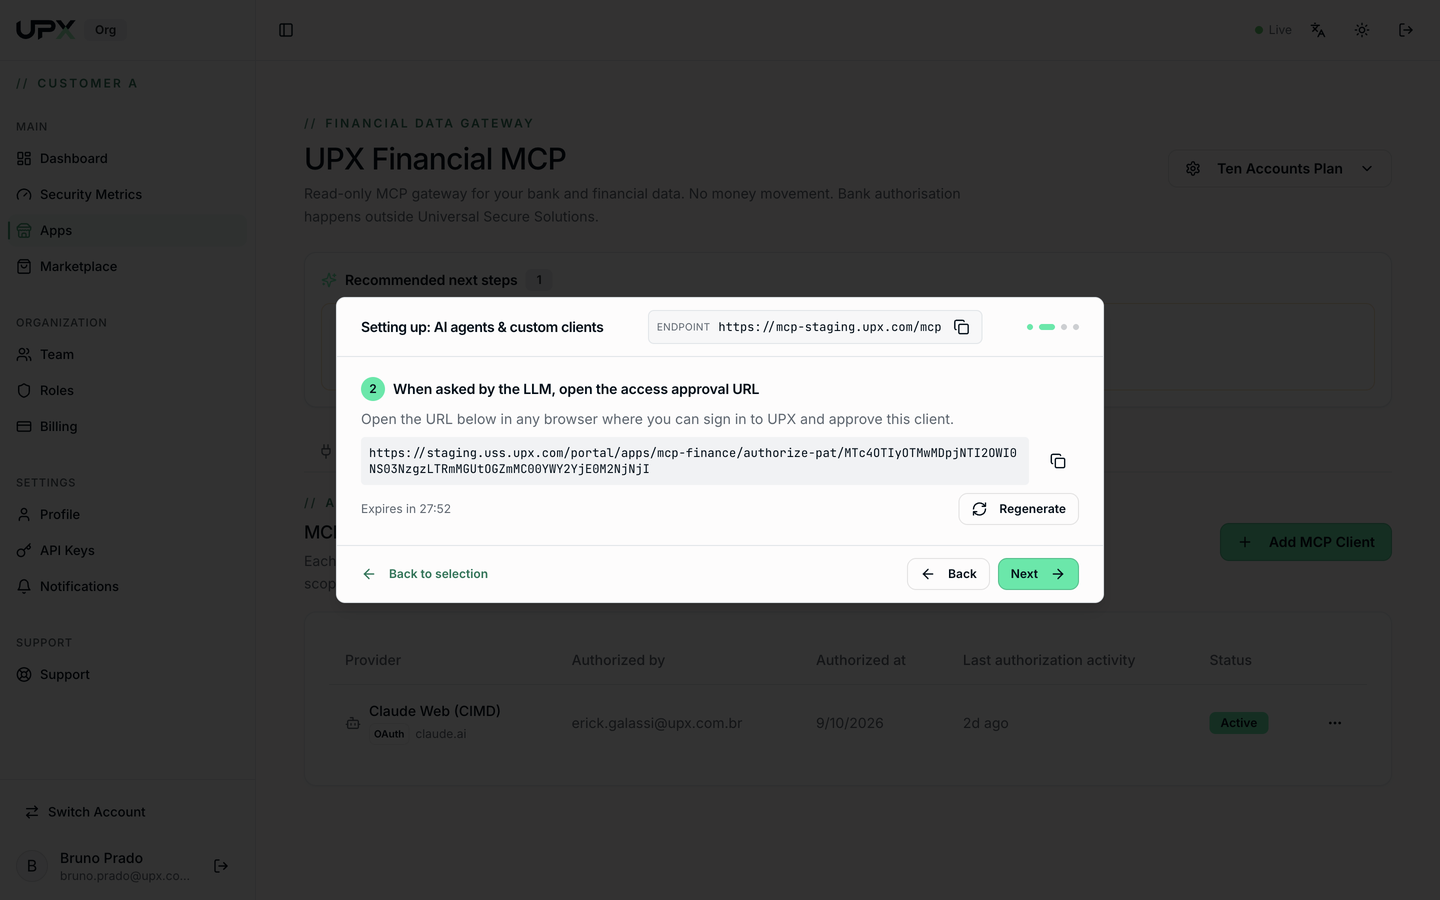
- Open the access approval URL when the agent asks — the link expires in ~30 min (Regenerate creates a new one). Sign in to UPX and approve the client.
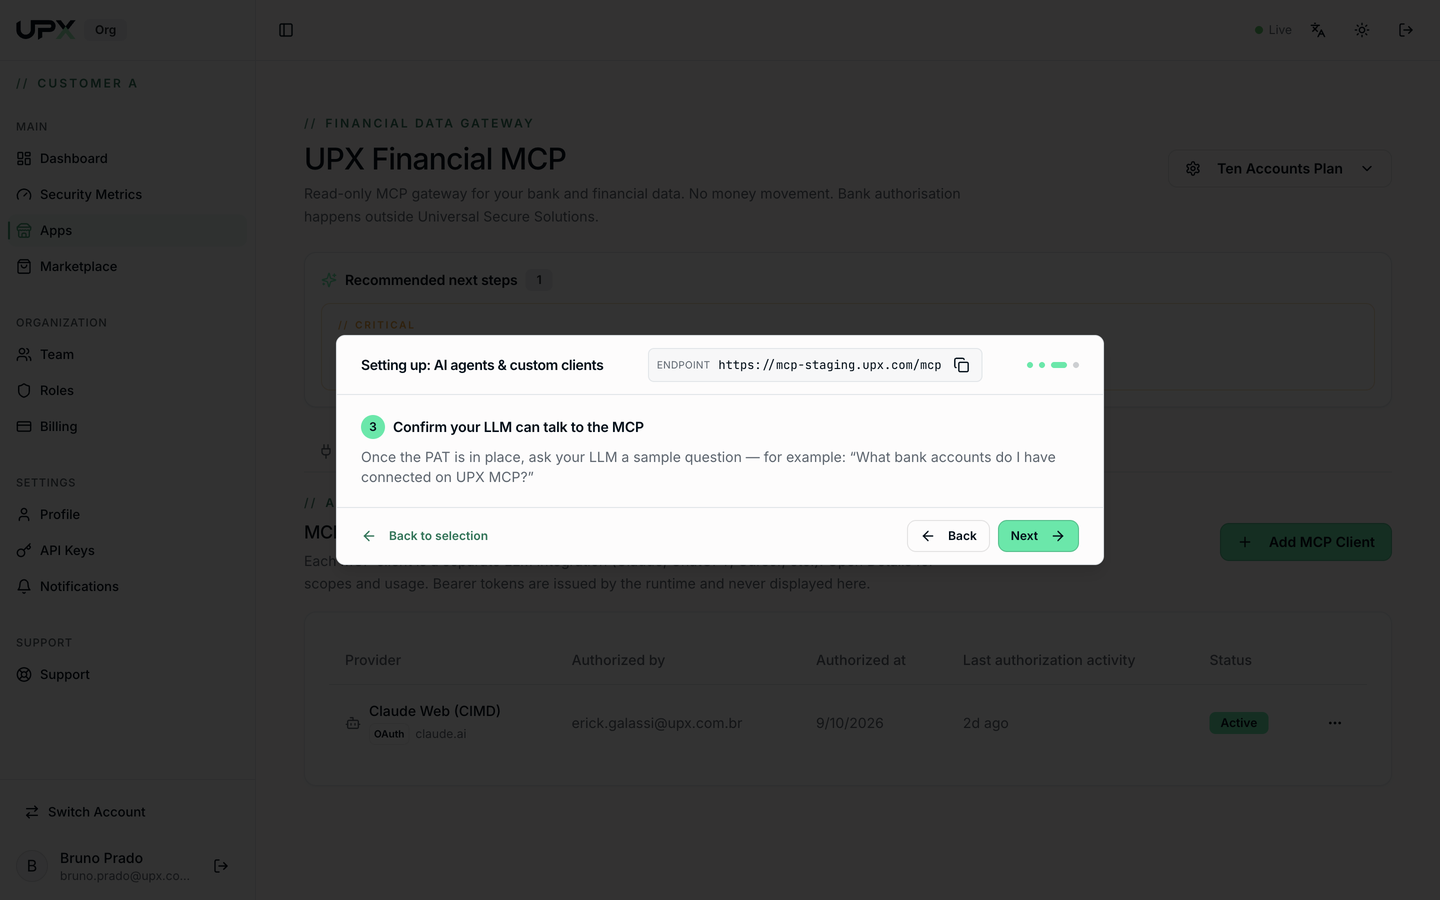
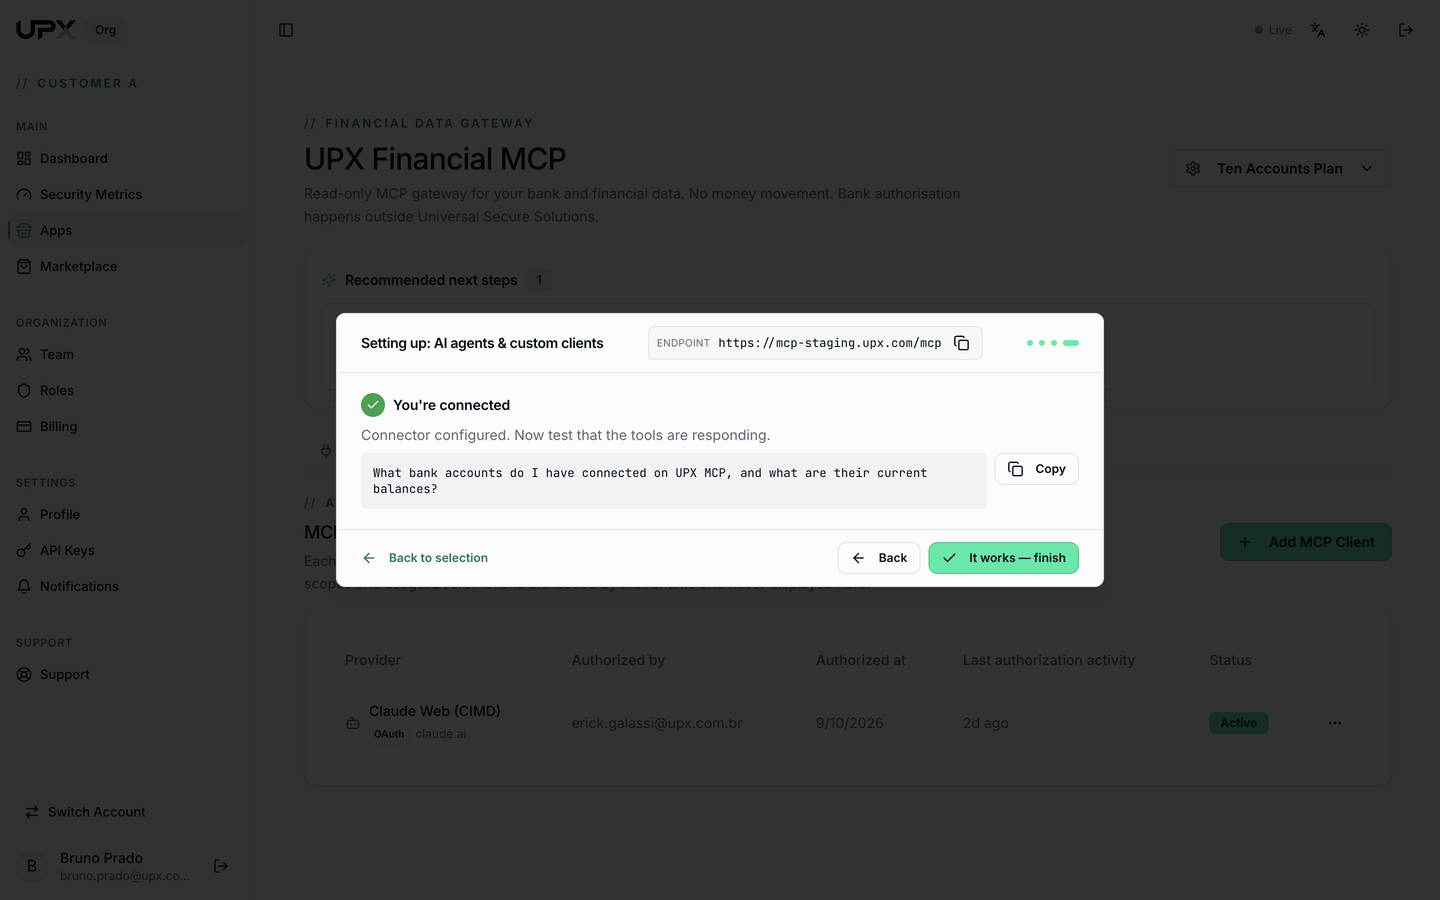
- Confirm the communication — ask the agent: "What bank accounts do I have connected on UPX MCP?"
- You're connected — click It works — finish.
View a client's details
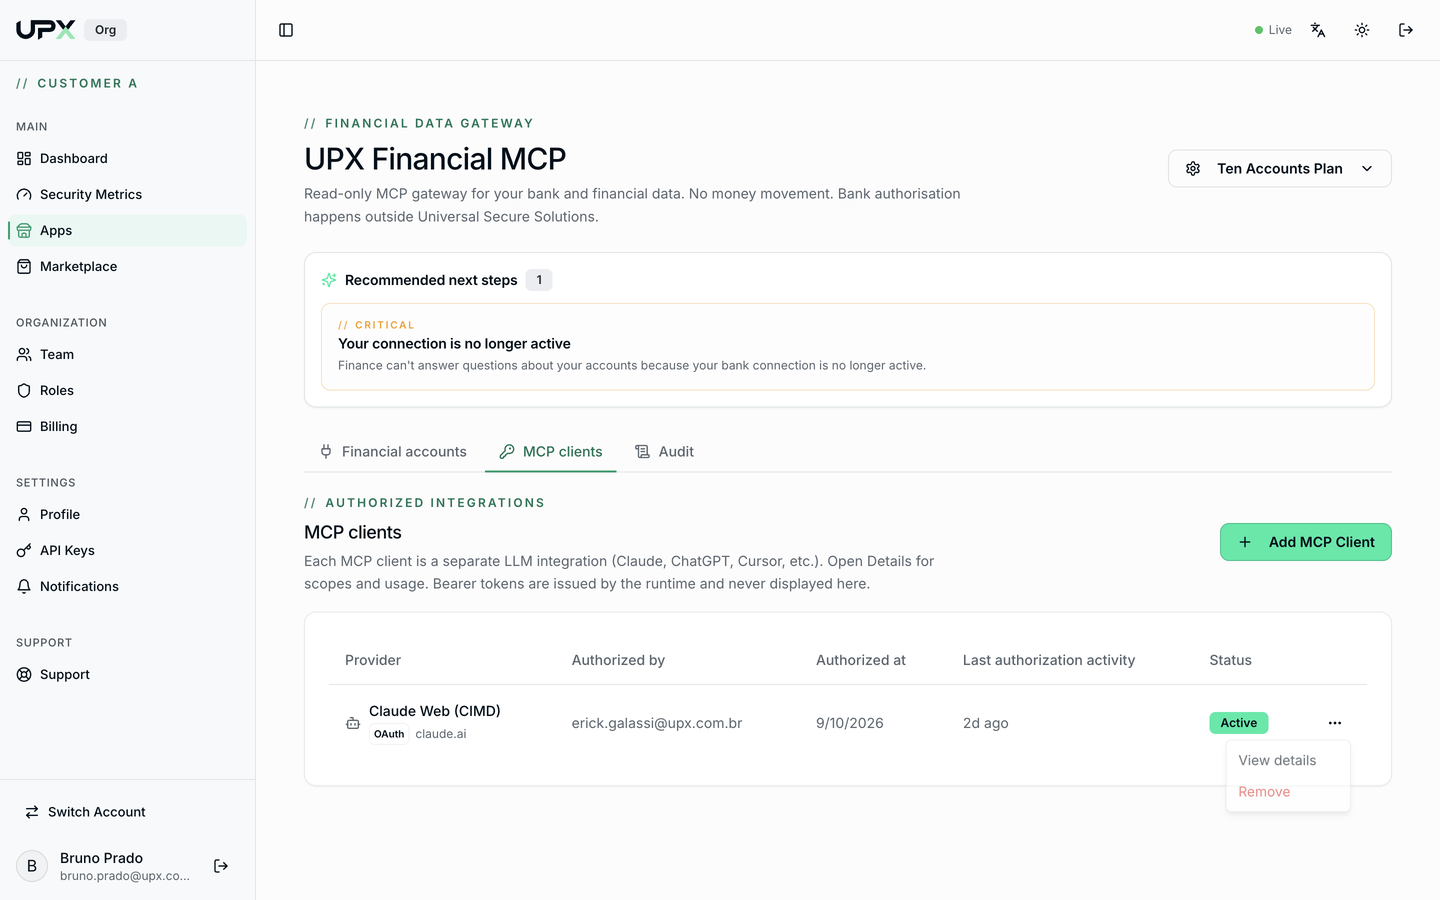
In the table, open the row's ⋯ menu → View details.
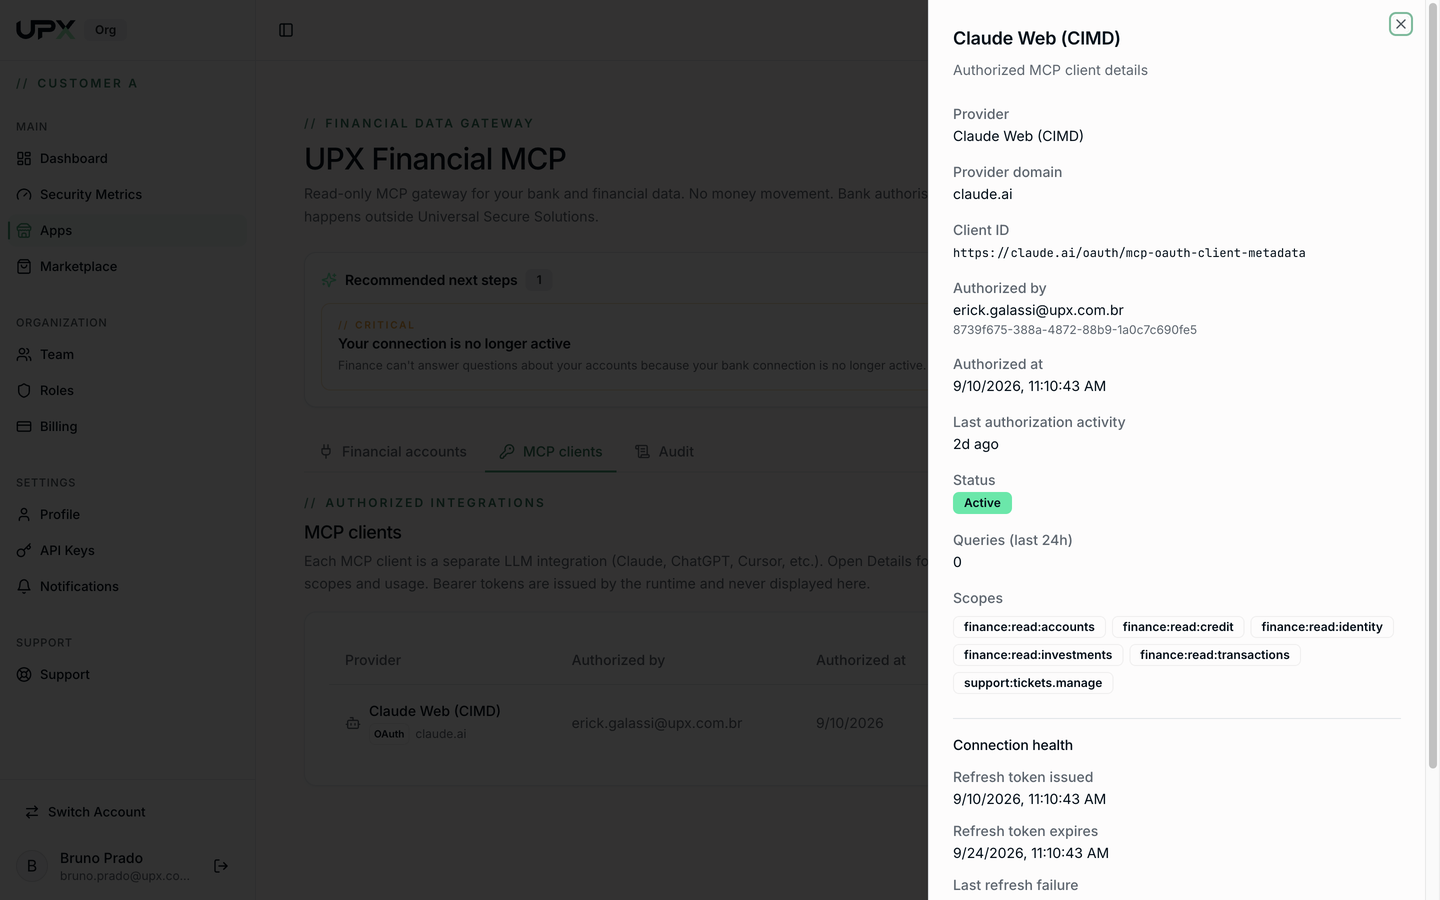
The panel shows the provider, domain, who authorized it and when, last activity,
queries in the last 24 h, the granted scopes (e.g. finance:read:accounts,
finance:read:transactions), and the connection health (refresh token
issue/expiry and recent failures).
Remove a client
In the same menu, Remove revokes the authorization on the UPX side. The assistant loses access immediately.
Also remove the connector inside the client itself (Claude → Connectors; ChatGPT → Settings → Apps → UPX → Remove) so no orphaned token is left behind.